In order to make perfect dosas, you need to get the dosa batter just right.
Getting the dosa batter for my dosas took me years to perfect. The information just wasn’t out there. One time I would make perfect dosas and then next time they would go terribly wrong. There seemed to be no rhyme or reason to the process but I can assure you there is. You are going to learn here how to make the perfect dosa batter.
Then you’ll learn how to use that dosa batter to make restaurant quality dosas such as masala dosas, cheese dosas and egg dosas. All is explained below.

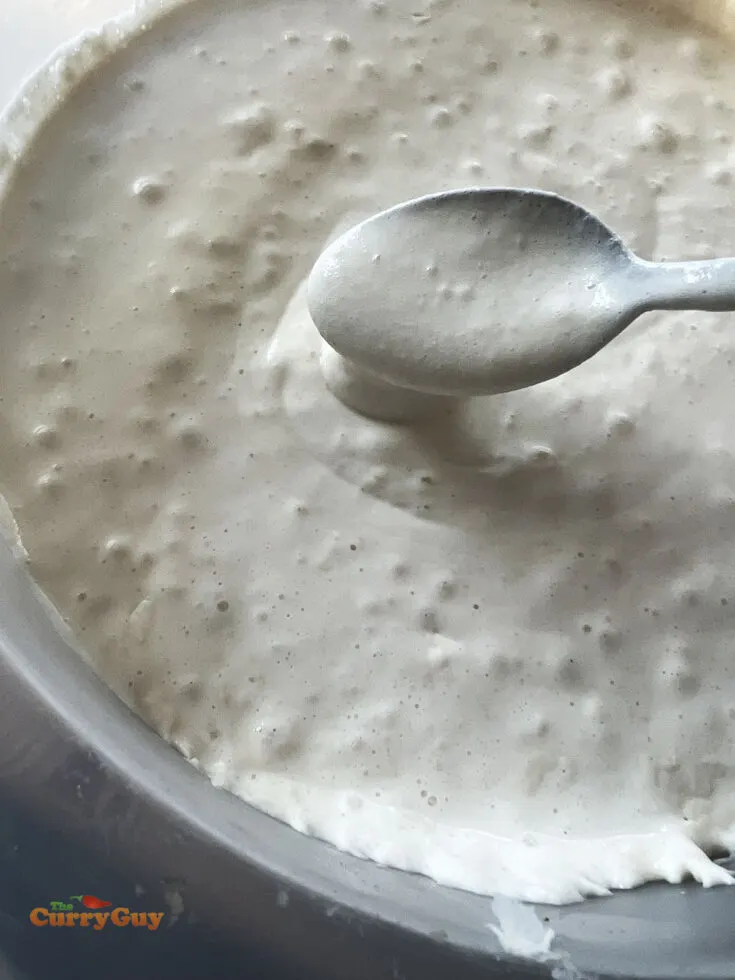
This batter is too thick. It’s perfectly fermented though so time to add a little water.
The first step of making dosa batter
You need to get those rice, lentils and fenugreek seeds soaking. For best results, pour them all into a large mixing bowl and wash with a few changes of water or until the water runs almost clear. When you first start, the water will be milky because of the starch in the rice. Cover with clean water and let soak for 12 hours.
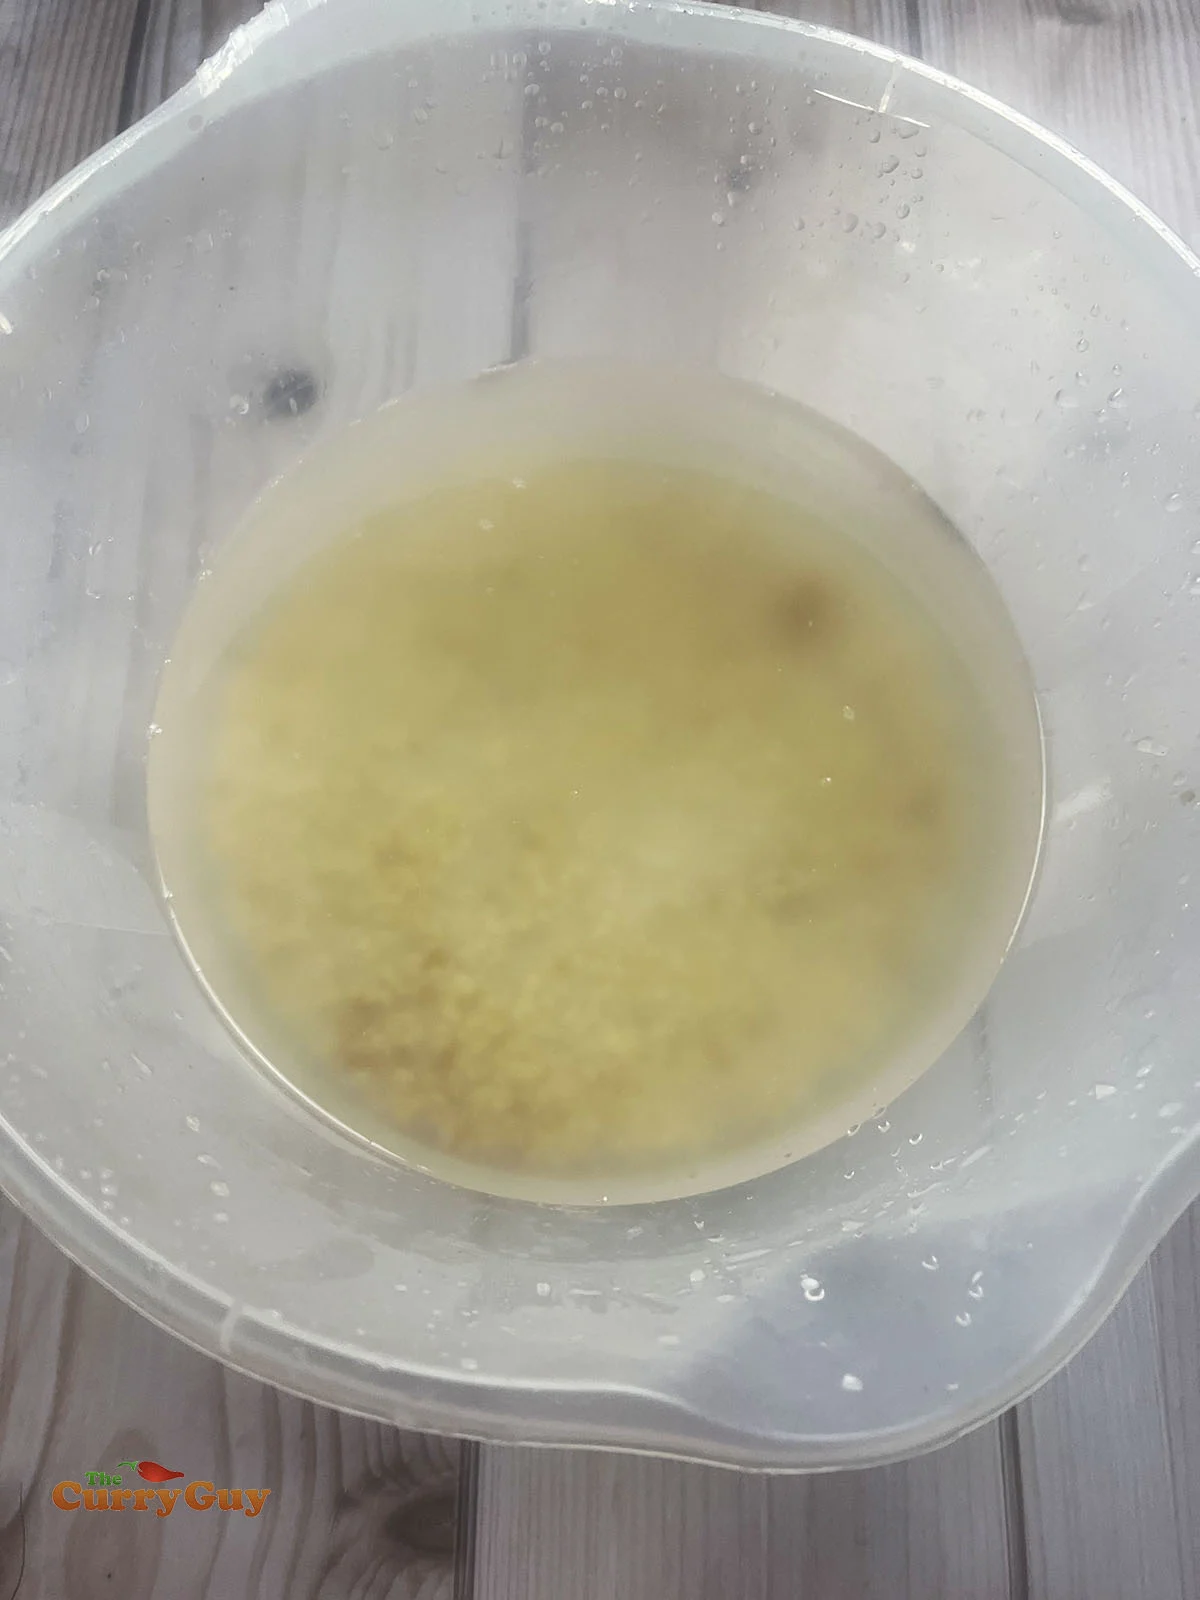
Soak the dal, rice and lentils for 12 hours.
Step two of making the batter
Once your rice, lentils and fenugreek seeds have soaked for a good 12 hours, it’s time to blend them. I recommend doing this in batches, adding enough water to blend until smooth.
Don’t worry too much at this stage about how thick the blended batter is. It should be quite thick but pourable so don’t add too much water.
If you stick your fingers in and rub the dosa batter between them, it should be really smooth or perhaps a bit sandy. Both are good.
Now for step three, fermenting the dosa batter.
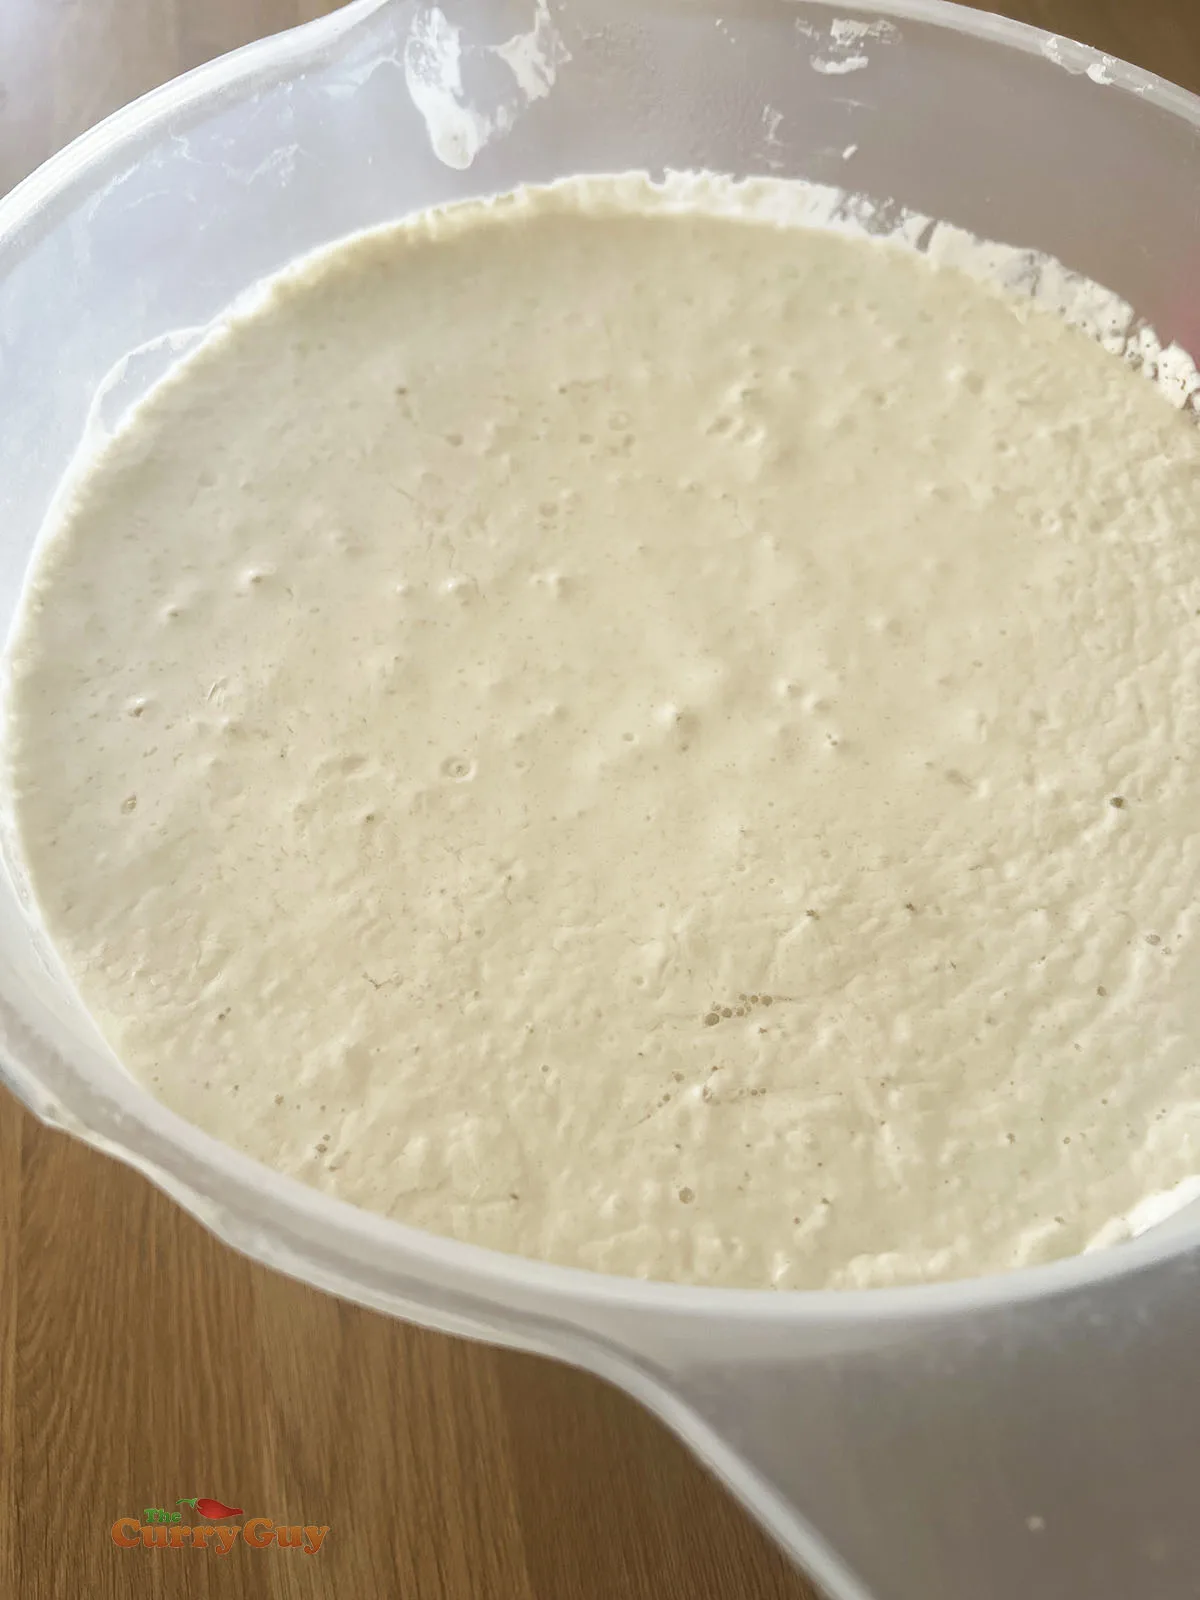
When you first blend the dosa batter, it will be creamy smooth. After fermenting, it will be bubbly and even a bit darker on top.
You need to cover the blended batter and place it in a warm location. Remember, the weather in southern India is quite warm. In colder climates like the UK, you often need to improvise.
You could, for example heat your oven to a medium heat and then turn it off. Place the dosa batter in the warm but not hot oven and let it sit there for a good 24 hours. You could let it ferment longer in a warm location and the flavours will intensify.
Sometimes I put the batter in my office next to an electric heater. You can keep warm in the Winter months that way and also get the batter just right. Treat that dosa batter like a baby and keep it warm.
Step four of making the dosa batter
If you keep your batter nice and warm for about 24 hours, it should double in size just like bread dough doubles in size when it sits in a warm location. The dosa batter will be bubbly and foamy and if you smell it, it should have a sour aroma from the fermentation.
Depending on where you kept it warm, it might have dried to your bowl in places or even have a thin crust on top. That’s fine. Just whisk it all together until smooth.
The fifth step is to make that dosa batter, dosa ready!
You will now have a rather thick and creamy batter. It will probably be too thick to use as dosa batter but the bubbly thick batter would be perfect for idlis or uttapams.
Think of the dosa batter the same way you would crepe batter. When thick, it could be added to a hot pan and you could fry it into an uttapam just like you would an American style pancake. It would not spread out easily on its own but rather just sit there in the pan.
To make dosa batter, you need to add a little more water so that it is thin and creamy like a crepe batter. When you pour it into a pan, it should start spreading out on its own, not like milk would but slowly. This is where you might want to experiment some. Add a little water and see if you have it right. You’ll know when you do. You can always add more water so only add the water a bit at a time until you get the consistency just right.
Now it’s time to make your first dosa with this dosa batter.
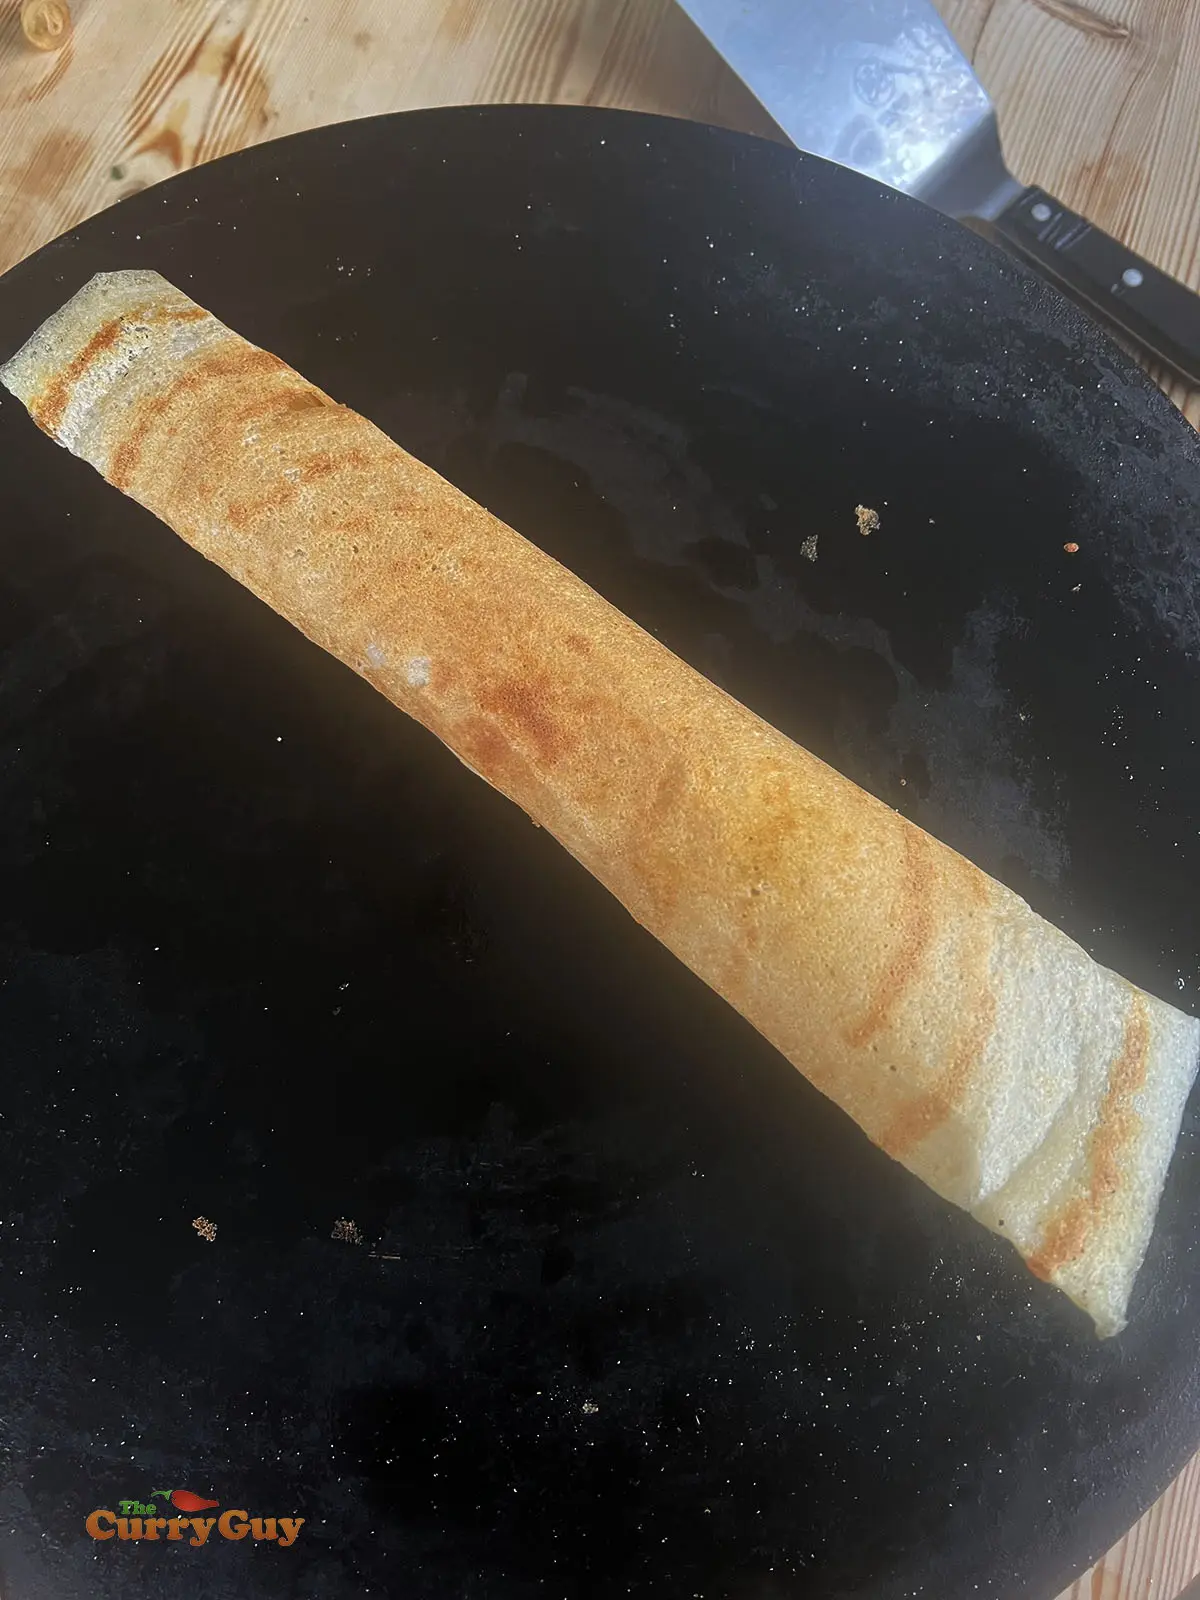
To get to the stage where you are making perfect dosas every time, you are going to need to experiment with that batter. It’s really quite an easy process when your batter is right. Following are a few troubleshooting points to consider or perhaps refer to when you start.
- Ensure your dosa batter is the right consistency: You are aiming for a thin but not too thin batter. It should not be thick like American pancake batter but rather a little thinner than crepe batter.
- Batter clumping: When you spread your batter over the hot surface it might clump up. There are two reasons this could happen. First, your cooking surface is too hot (the right temperature is explained below.) Second, your batter might be too thick. Keep both of these in mind if your dosa batter is clumping.
- Bubbly dosa surface: If your cooked dosa look bubbly on the exterior instead of smooth, then your batter is too thick. That said, many restaurants serve bubbly dosas so that is not a bad thing. It’s down to your personal preference.
- Uneven colouring on the dosa: Other than presentation, this is not a bad thing and your dosa will still taste good. Uneven colouring as in the photo below is usually due to using too much oil in the pan. The oil bubbles as it sizzles and creates a pattern of browner and lighter parts of the dosa surface.
Choosing the right dosa pan
This is an important part of making the perfect dosas with your dosa batter. When I first started making dosas, I used a le Creuset non stick crepe pan. That worked and it’s perfect for beginners but then I moved up to the cast iron version.
You might want to consider cooking on cast iron as non stick pans are exactly that, non-stick. To get a really smooth dosa surface, you want that dosa to stick to the pan some. That said, I did get good results cooking on a non-stick surface.
The size of you pan does limit how large you can make your dosas. So as I continued making dosas, I started using a cast iron crepe maker which is great because the surface is larger and there are no sides.
You could use a normal frying pan but the sides of the pan will limited how large you can swirl that dosa batter. You will find them limiting and even a bit difficult to use.
Getting the heat in your pan just right.
Heat your pan over a medium high heat. With a crepe maker, I set the heat to 190c (375f) which is the perfect temperature for cooking dosas. If cooking in a pan on the stove, sprinkle a few drops of water on the surface as it is coming up to heat. They should evaporate on contact. That is when the heat is right.
Be careful though. You don’t want the pan any hotter or it will be too hot too swirl the dosa batter.
How do you keep the temperature right in a pan?
Dosas can cook on a higher heat than 190c (375f) once swirled flat. It’s the swirling part that needs to be done at the lower heat. So each time you make a dosa, dab half an onion in some cold water and rub it all over the surface. This will cool the surface for your next dosa but of course you need to regulate the temperature by reducing the cooking heat if necessary.
Greasing the pan or crepe maker
You need very little oil if any to make dosas. Originally I used a drop of oil that I spread thinly over the surface. Nowadays, I don’t use any oil on my cast iron crepe maker. If you do use oil, you really only need a drop. Use half an onion to spread it out evenly over the surface.
The onion not only adds flavour but helps the dosa not stick to the pan.
How do you swirl the dosa batter over the surface?
Once your pan is up to heat, it’s time to get cooking that first dosa. Take a ladle of batter and pour it in the centre of your pan. It should slowly begin to expand across the pan but by slowly, I meat slowly. It should not be so runny that it just fills the pan!
Once you add that dosa batter, it should spread out a tiny bit but look like it needs some help. Allow the dosa batter to sit in the hot pan for about 3 – 5 seconds to start cooking the underside and then take your ladle and place it down right in the centre of the batter.
Begin swirling in a continuous circular motion, making small circles in the middle and gradually making larger circles to push the dosa batter out and increase the size of the dosa. This should all be done in one motion without lifting your ladle.
Attempt to make your dosas as thin as you can in this way with the thinnest part of the dosa being the edges which will crisp up nicely.
Cooking the dosa
Now things get a bit easier! Let the dosa cook on the hot surface. If you spread the dosa batter out thin enough, you will see it beginning to brown on the underside.
As you cook the dosa, the edges might start to come up in places. That is normal but I usually press them back down some to get extra crispy edges.
In the photo below, I am making a butter dosa so I added a little butter to the top. You should also drizzle a little butter or oil around the edges to make them really crispy.
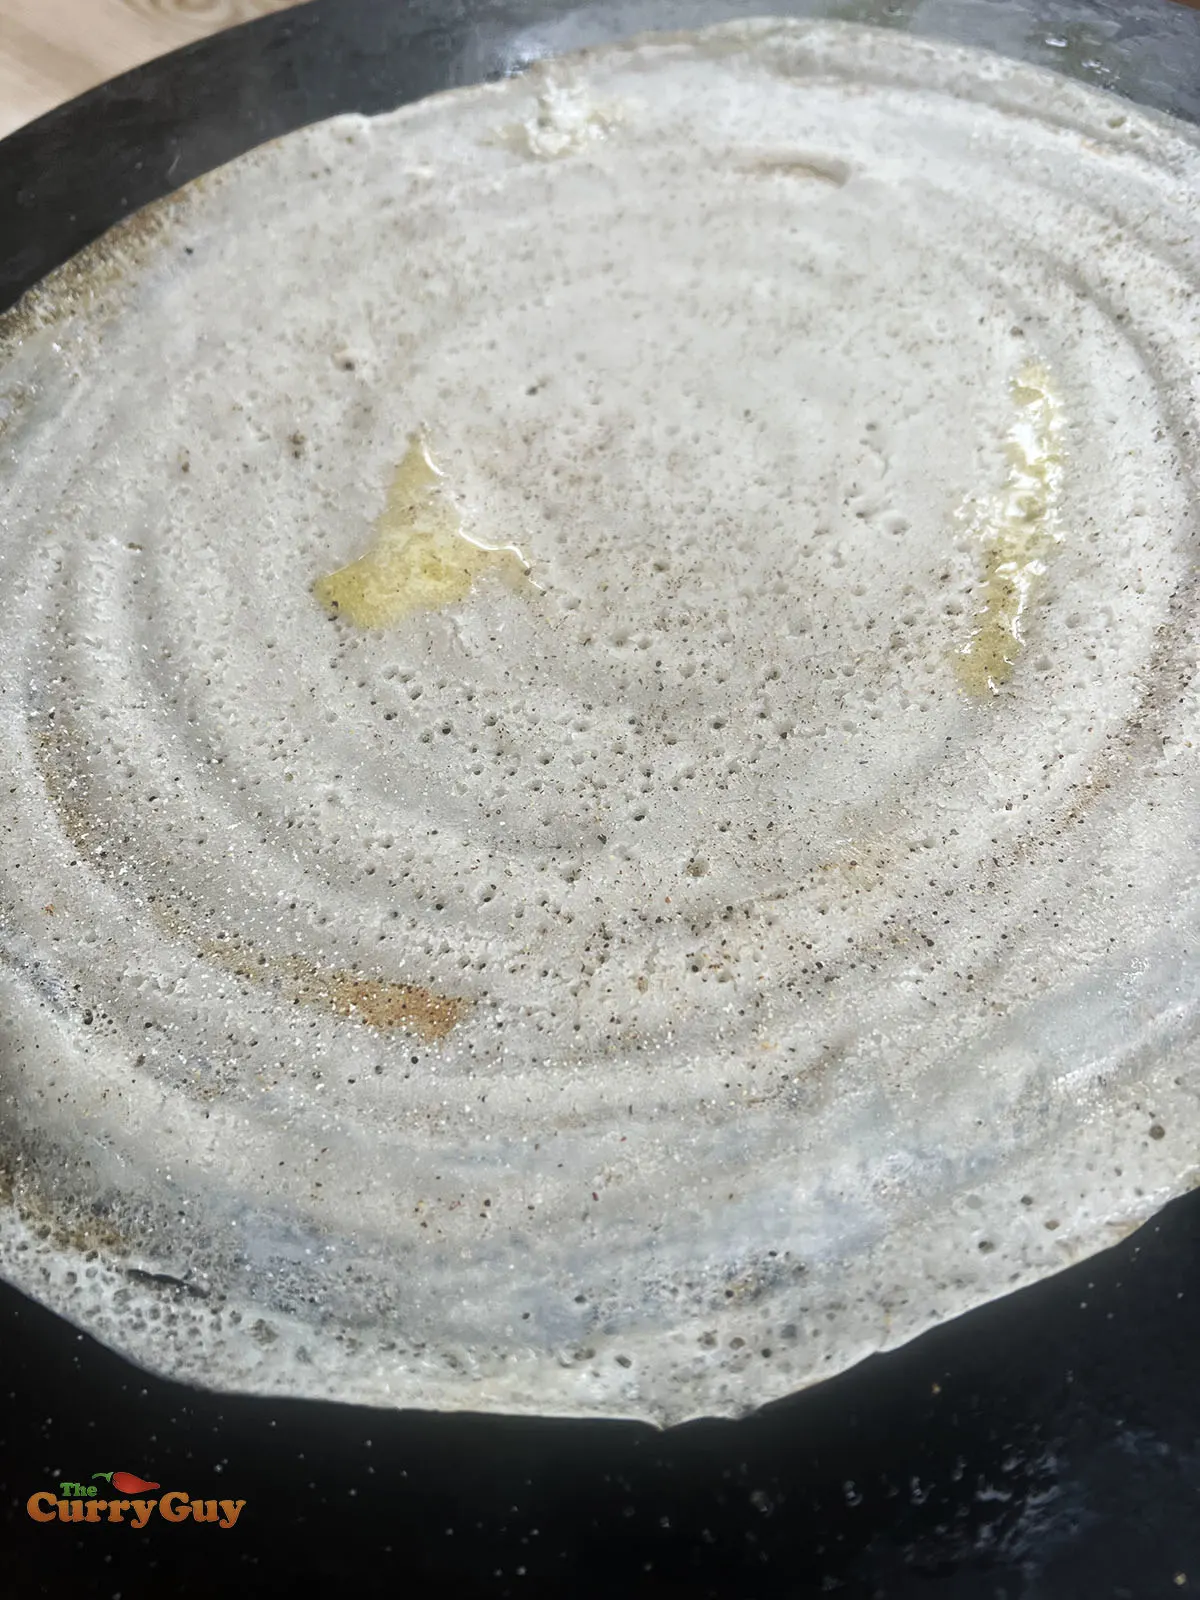
Dosa batter spread in a circular motion outward. notice the round design made with my ladle.
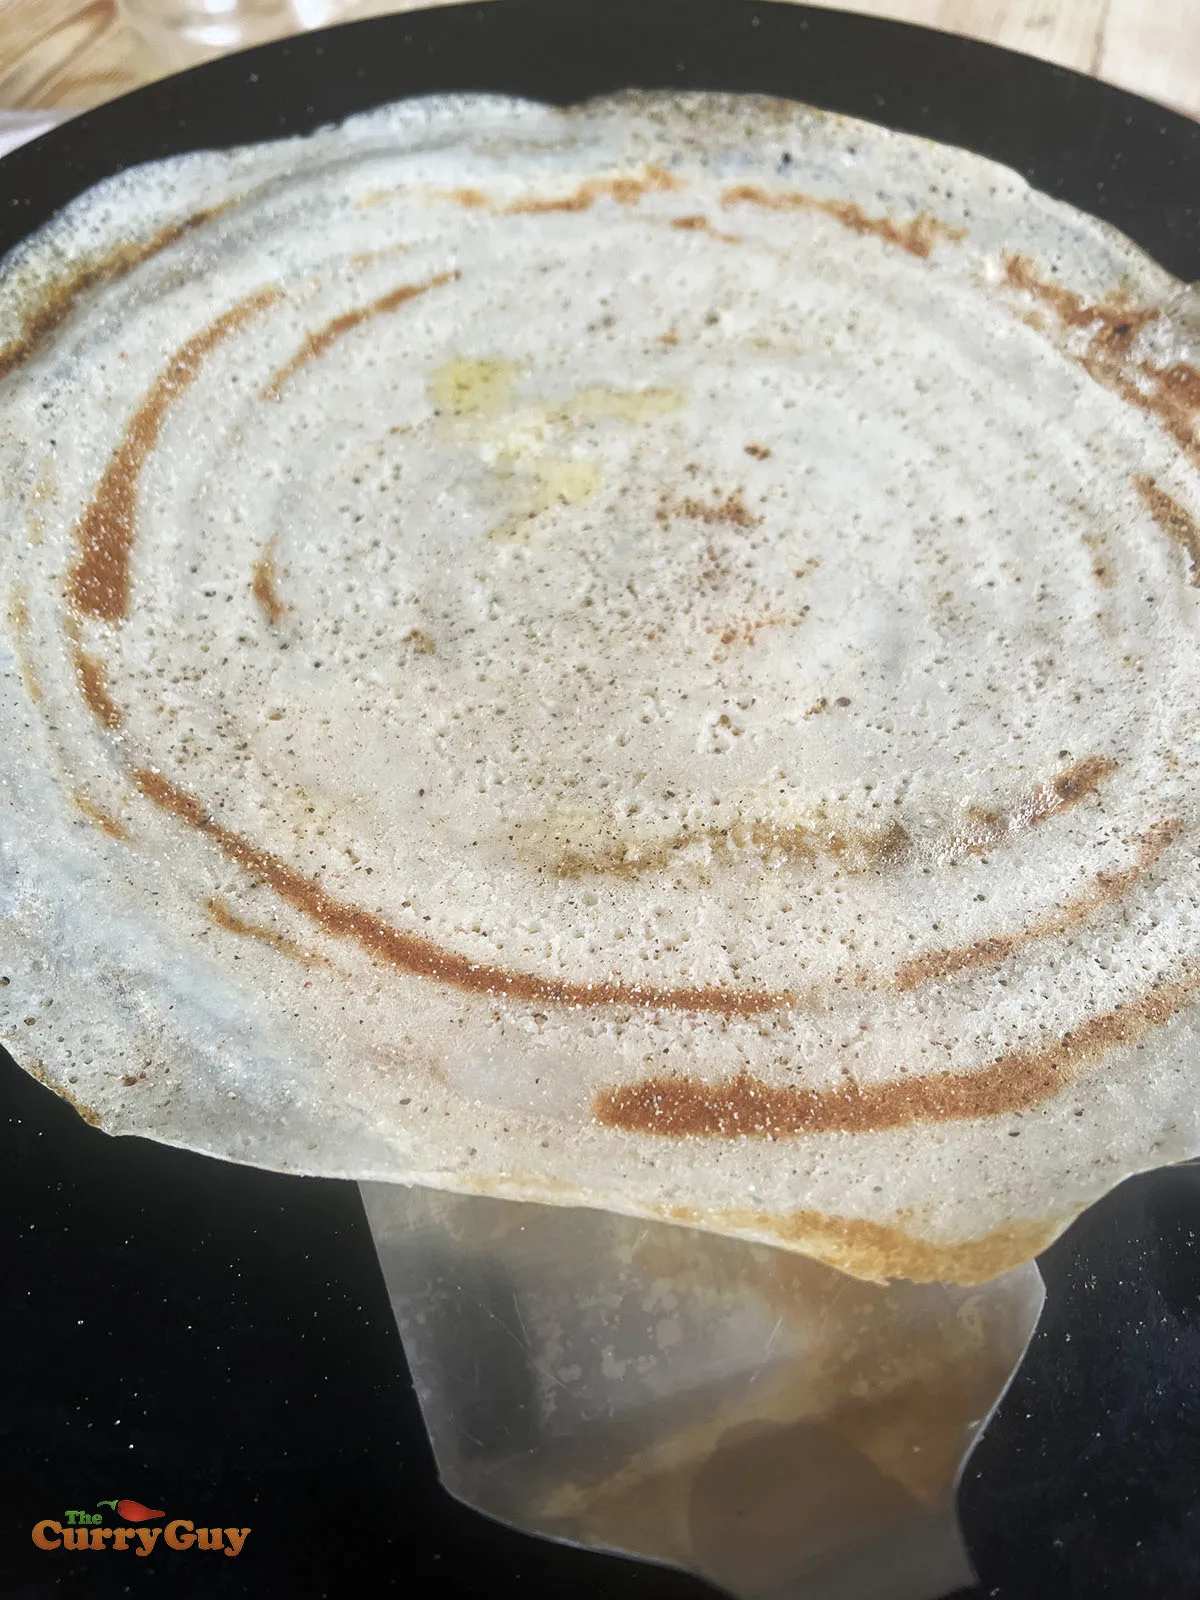
As the dosa cooks, you will see it browning on the underside.
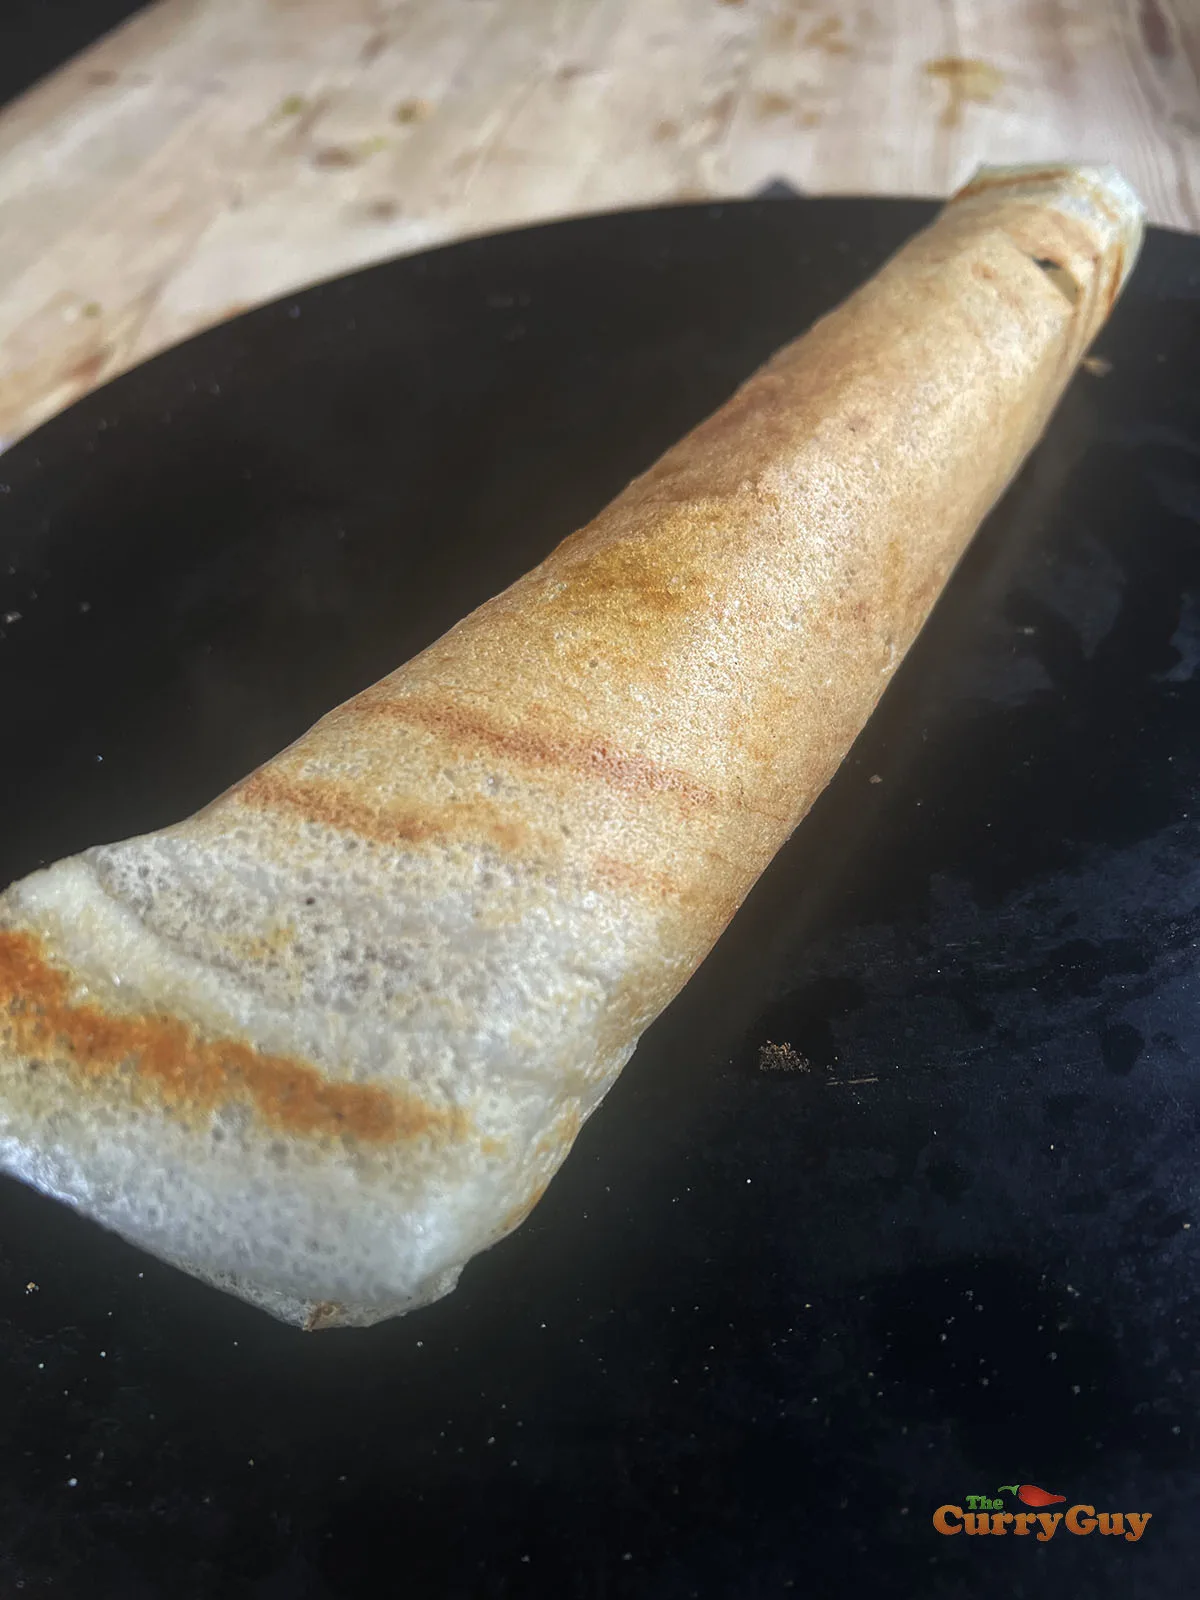
Use your spatula to pry the dosa off and roll it. Ready to eat!
How long does that dosa batter keep?
Once your batter has fermented, you can keep it covered in the fridge for about 3 days. Perhaps longer. As it sits, it will ferment more which adds even more to the flavour.
What do you serve with dosas?
There are many different popular chutneys you can serve with your homemade dosas. Why not try some of these…
How To Make Perfect Dosas
Ingredients
- 300g broken Basmati rice*
- 75g urad dhal lentils
- 1 teaspoon fenugreek seeds
- 1 teaspoon Maldon sea salt
- 1 teaspoon sugar
- 3 tablespoons sunflower oil
Instructions
- Combine the rice, lentils and fenugreek seeds in a large bowl and rinse three times with water.
- Pour enough warm water into the bowl to cover and soak for 12 hours or overnight.
- When ready to make your batter, drain the water.
- Place half of the rice mixture into a food processor with about 100ml of water and blend for at least five minutes until very smooth. You do not want to rush this. It is an essential part of making the batter.
- Repeat with the rest of the rice mixture adding another 100ml of water.
- Combine the two batters and add the salt and sugar. Whisk thoroughly.
- Now place the batter in a air-tight container and leave in warm location to ferment for 24 hours.
- When ready to cook, place a non-stick - or normal frying pan over a medium-high heat.
- The pan is ready when a drop of water sizzles away almost immediately.
- Using a ladle, pour about 150ml of batter into the centre of the pan.
- Then working very quickly and working from the centre, take the bottom of your ladle and move the batter in circular motions outward so that it is flat and not thick.
- Turn the heat up a little. The sides of the dosa will begin to brown and move away from the pan after a few minutes.
- When this happens, trickle about ½ tablespoon of the oil around the edges of the dosa.
- When the dosa is browned on the under side roll it up or fold it in half to serve
- Repeat until all of the batter is used.
Notes
Blending: I now use a Vitamix to blend the batter which only takes about a minute. With my earlier blenders it took about 5 minutes to blend. With some blenders it is important that you do this slowly. Blend for two minutes at a time until you have a smooth batter. Try blending for 5 minutes in one go and you could overheat your blender so be careful.
*Broken rice: You can use normal Basmati rice but broken rice is less expensive and does the same job.
Recommended Products
As an Amazon Associate and member of other affiliate programs, I earn from qualifying purchases.
Nutrition Information:
Yield:
8Serving Size:
1Amount Per Serving: Calories: 136Total Fat: 6gSaturated Fat: 1gTrans Fat: 0gUnsaturated Fat: 5gCholesterol: 0mgSodium: 284mgCarbohydrates: 18gFiber: 3gSugar: 1gProtein: 4g


Asha
Thursday 24th of August 2017
Are you supposed to flip the Dosa over? The instructions don't mention it, but in one of your comments it sounds like you flip it more than once. Please clarify. I cannot wait to try this! Thank you.
Dan Toombs
Sunday 27th of August 2017
Hi Asha
Thanks for getting in touch. No, don't flip the dosa. You only need to cook it on one side as it cooks through anyway.
Thanks, Dan
ndemi
Friday 9th of June 2017
Must i use Maldon sea salt or any sea salt is okey?
Dan Toombs
Friday 9th of June 2017
Hi Ndemi
Any salt will do. I like Maldon as it is flaky and not as salty as normal table salt. Just add salt to taste as you won't need as much.
Thanks, Dan
Tara
Tuesday 25th of April 2017
One additional way to use the dosa batter - or idli batter - in the microwave. Just fill the bottom of a soup bowl in a microwave safe material about 1/4 full with the batter, add chutney or curry or sambar or gun powder, cover and then microwave for about 3 minutes (depending on the strength of your appliance)...and voila ! Eat right out of the bowl :-)
Dan Toombs
Thursday 27th of April 2017
Hi Tara
Thank you very much for that tip! I've never heard that before. I'm going to try it.
Thanks, Dan
Meic
Thursday 9th of March 2017
Do you need to use mineral water? Or at least, tap water that's stood for 24 hour to de-chorinate it? The fermentation seems to use natural yeasts, and I have found when I make fermented vegetables and sourdough bread that tapwater kills it. These days I stick to carbonated mineral water.
Dan Toombs
Friday 10th of March 2017
Hi Meic
Thank you. To be honest I've never considered that option. Will give it a try. I use tap water and it ferments really well. I guess it depends on where you are in the world. Some places I would only use bottled water.
Will give your idea a try. All the best, Dan
Paddy
Tuesday 3rd of March 2015
Hi Dan, I'm really looking forward to making these for the first time this weekend. Can you clear up the part where we drizzle the oil please? Does the oil go onto the surface of the dosa, or does it go onto the pan and underneath the edges of dosa? Also, what is the purpose of this, what are we trying to achieve? Thanks for your time with this and thanks for a great website!
Dan Toombs
Thursday 5th of March 2015
Hi Paddy
The oil isn't really necessary but I like to use it. Drizzle a little around the edges right before you flip them over the first time. This will make the edges of the dosa nice and crispy.
Dan