I've taken to dry ageing my own beef to achieve even better flavour

I have fond memories of barbecue season long ago at university in Sacramento California. My roommates and I used to have a butcher up the road who dry aged all of his beef cuts for at least a month. We had some amazing barbecues during that time.
Nowadays it's difficult to find a butcher in the US. Almost all the meat is sold through supermarkets - a trend that unfortunately appears to be happening here in the UK too.
The meat is slaughtered and sent to the supermarket as quickly as possible and ageing to perfection is out of the question.
Some good butchers still dry age their beef for a good few weeks but such service is hard to find.
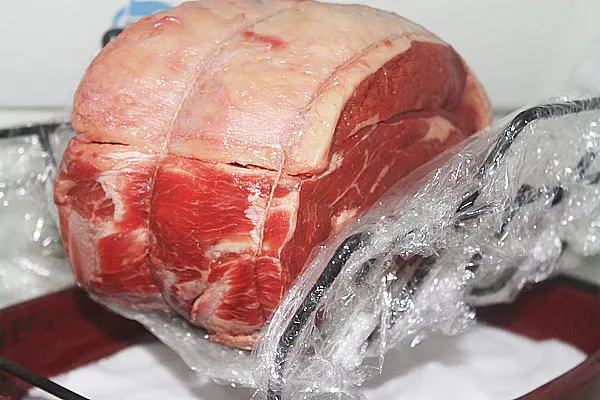
So with that in mind, I've taken to purchasing meat and ageing it myself.
The end product is amazing. Even good butcher meat can usually do with another couple of weeks of ageing.
So then, before you start, I'd like to warn you... I'm not an expert at dry ageing. I do a good job of it but my fridge is probably not the place health and safety would approve of. So if you get ill or die, don't blame me.
I've aged beef many times and have never had a problems. Even the one time when a little blue mould grew at the bottom, I cut it off and served it right up. Perfect!
The only reason the mould grew was because juice from the beef couldn't escape well enough into the salt. Use a rubberised stand or tightly wrap plastic wrap around a metal stand and you shouldn't have any problems.
Dry Ageing Your Own Beef
Ingredients
- 1 standing rib roast or other cut of your choice
- 4 cups - (1 litre) small rock salt
- 1 rubber rack or a metal rack rapped tightly with clingfilm. It is very important that the liquid from the meat can drain into the salt. It must not get caught on the plastic or it will mould.
Instructions
- Pour the salt into a large tray and place the rack on top with the meat.
- Place the meat in a fridge - preferably one that isn't used often. I only checked my beef once a week.
- You want the temperature to be between 34 and 37F (2.2 and 3.3C).
- While the meat stands there over the salt, it will lose about 20% of its weight as the liquid goes into the salt.
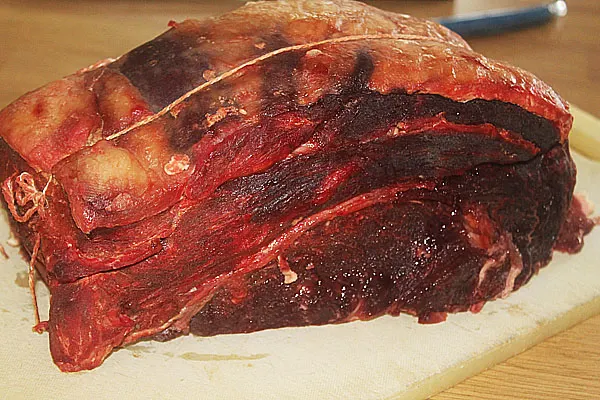
- After 15 to 28 days ( the longer the better) trim of the hard black outer. You may think this sounds wasteful but believe me it's worth it. You will only need to trim about 3mm from the outside as it will be too dry and tough to eat.
- What's inside is properly aged beef which you can cook as a rib roast or cut into the most awesome steaks you'll ever have the pleasure of enjoying.


Keith Povall says
Cracking piece Dan. I let my butcher do all the hard work. He knows me well enough now. Said to me the other day, "Gorra birra beef here for ye, it's gooin black"
He knew I would approve. Good old Bob the Butcher
Dan Toombs says
Nice one Keith!
Foodhuntr says
Thanks for this awesome post. Nice item of beef.hope to try soon