Once you've tried this homemade poppadom recipe, You'll want to make it again and again!
This is a homemade poppadom recipe for those who really want perfection. If you have ever tried the poppadoms in India or at good Indian restaurants in the West where they make everything from scratch, you'll know that their poppadoms are so much better than anything you can purchase at your local supermarket.
Here you will learn how to make homemade poppadoms! I have included step by step photographs below that you will want to look at as a guide.
This homemade poppadom recipe is not difficult but you will want to study the step by step photographs to ensure you get the recipe right the first time. If you would rather just learn to make poppadoms using shop bought papads, click here.

Papad vs. Poppadom
Just so there is no confusion, let's start with what a papad is and what a poppadom is.
Papads are what you are making here. They are the flat discs that when fried or grilled, quickly become poppadoms.
Useful Equipment and cooking aids.
- A large high-sided pan such as a wok: I find a wok to ge the best for this poppadom recipe. The wide top makes it easier to turn the poppadoms when frying.
- Tongs: These are essential for flipping the papads as they cook in oil or on the grill.
- Paper towels or a wire rack: You can transfer the cooked poppadoms to a paper towel or wire rack to drip any excess oil.
About this poppadom recipe...
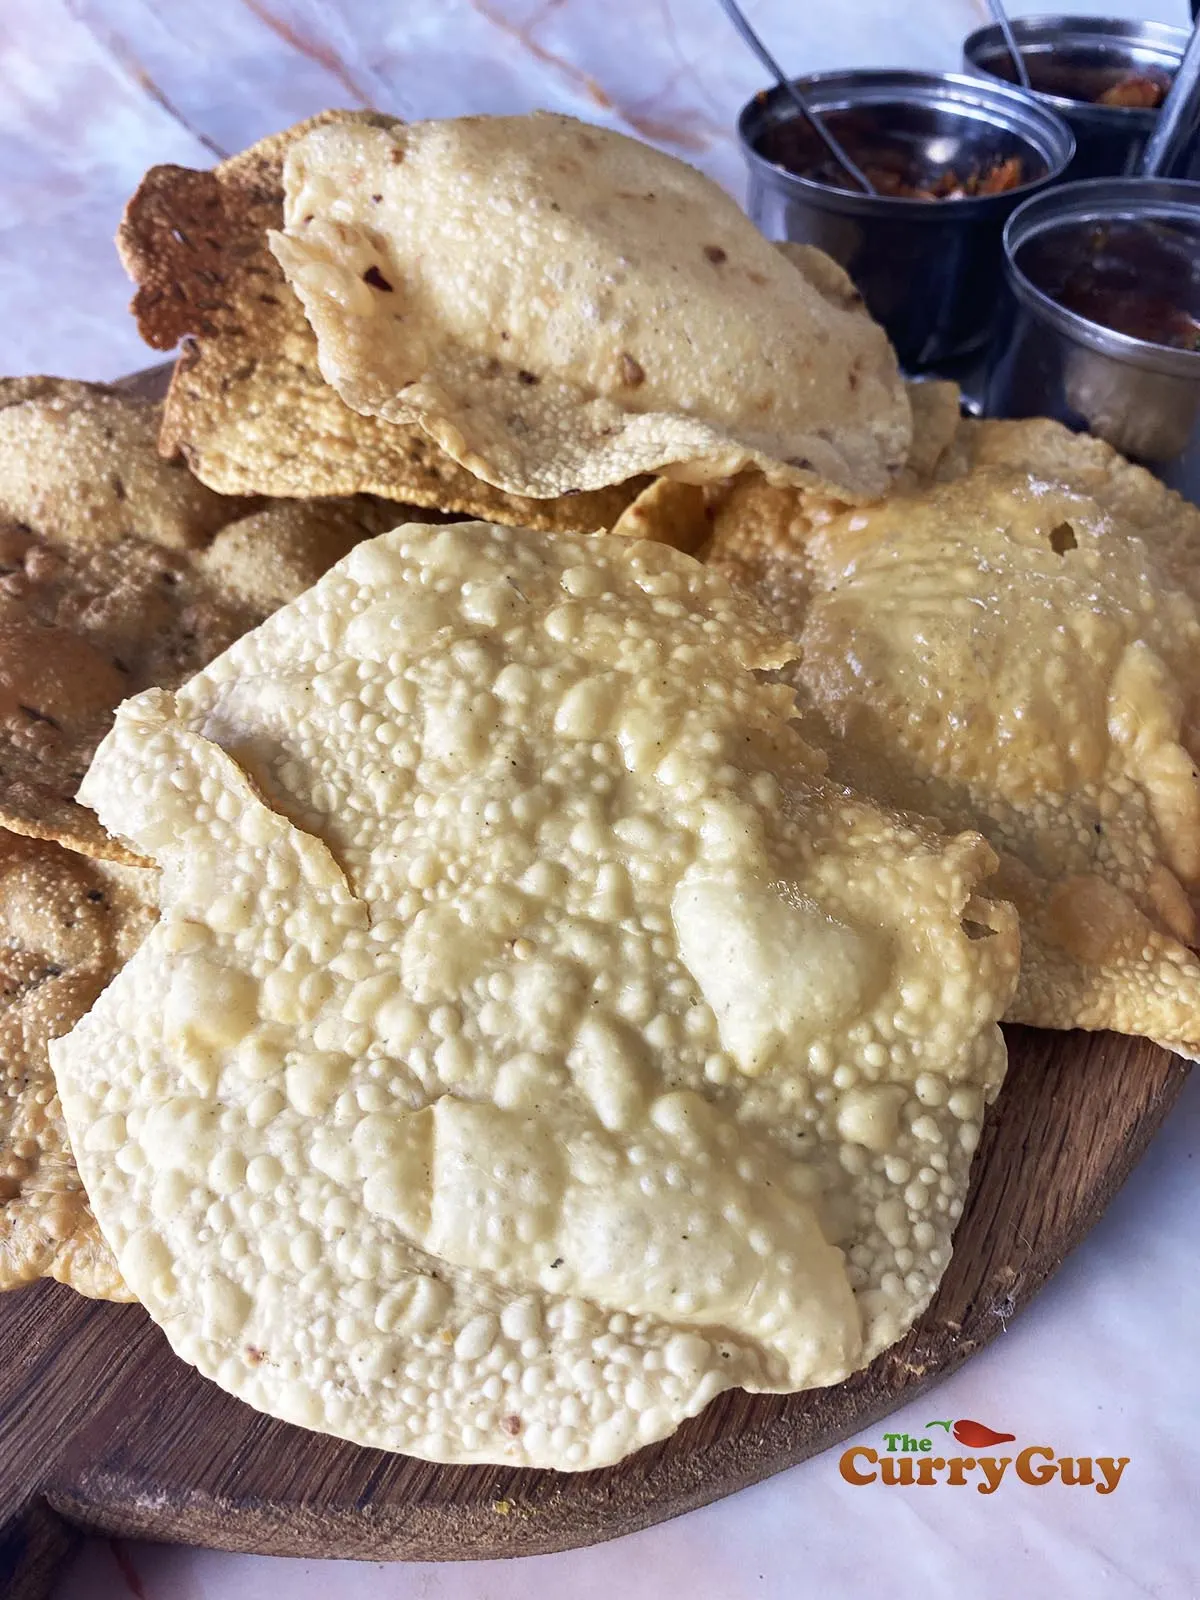
Just look at those amazing homemade poppadoms in the photo above. With this no-fail poppadom recipe, you will be making poppadoms just like these in no time. I promise!
I had tried to make homemade papads a few times but it wasn't until I visited a poppadom shop in Kerala that I learned how to make them just like they are there. I even purchased some of their fresh papads to take home with me so that I could compare what I made to what was on offer there.
You are going to get the real deal here.
What should you expect?
This recipe gets fantastic results. You can expect crispy and in places chewy poppadoms. That's right, the best and freshest papads have many different textures when fried or grilled.
In fact, the poppadoms served in Kerala and all over India are not just served as a starter as they are in the West. They are much too good for that.
It's not only the delicious flavour you will get from this homemade poppadom recipe but those fantastic textures. What's more, you are completely in control of the textures. From crispy to soft or a little bit of both, you will be in complete control of the end result, so you can make your poppadoms exactly as you like them.
How do you easily adjust the different textures in your homemade poppadoms?
If you only dry the them for about four hours as explained in my poppadom recipe and photos below, your papads will puff up and be deliciously crispy and soft in places when you fry or grill them into poppadoms.
By drying the papads longer, they will of course have less moisture in them and will become crispier when fried or grilled.
To get extra crispy poppadoms, you could run the dough through a pasta machine until super thin. I personally prefer different textures in my poppadoms so rarely go to this trouble.
Can you flavour your papads?
Yes and it's really good to do so. In the photos below, I added toasted cumin seeds to mine.
You could also add other spices such as cracked black pepper, chilli flakes or even chilli powder which will give the poppadoms a red tone as well as make them spicy.
How do you serve poppadoms?
If you have dined at the curry houses in the West, you will know that they are usually just served as a crispy starter with a selection of chutneys. That's a good way to serve them.
When you make your own poppadoms using this poppadom recipe, you might like to try serving them as they are in southern India. Poppadoms are often served on top of a curry which adds to the experience. The crispy texture of the delicious poppadoms goes so well with a good curry like this chicken coconut curry. You'll love it!
How long can you store fried or grilled poppadoms?
These will keep in an air-tight container for at least 3 days and be just as good as the day you made them.
Can you freeze homemade poppadoms?
Follow this recipe up until you fry or grill the papads. Then stack the individual papad discs, separating each with wax paper and freeze.
You can freeze the papads for up to a year and they are great to have on hand. All you need to do is let them defrost and fry or grill them as in the recipe card below.
Frying vs. Grilling
The most popular option for cooking homemade papads is to fry them. Heat about 10cm (4 inches) of neutral flavoured oil such as rapeseed (canola) oil to 190C/350F. If you don't have an oil thermometer, toss in a small piece of papad. If it bubbles and rises to the top immediately, your oil is hot enough for frying.
Each fried poppadom will be ready in about 10 seconds so it's. a quick job.
To grill, the best way to do it is on your barbecue. Get the coals nice and hot and then place a popad on the grill. Cook it, turning every few seconds until it turns crispy.
Step by step photographs of this homemade poppadom recipe...


Once you make your poppadoms, you might like to make one or more of these to dip them in.


What else to serve alongside this poppadom Recipe?
You can serve this recipe on its own or alongside a variety of other Indian starter dishes — you’ll absolutely love it! Try pairing it with some raitas or chutneys for extra flavour.


Have you tried this homemade poppadom recipe?
If yes, please give it a star rating in the recipe card below and leave a comment. I love receiving your feedback and I'm sure other readers of my blog do too. Thank you.
If you are not already doing so, please follow me on Instagram and Facebook for all my latest recipes.
Homemade Poppadoms
Using this poppadom recipe, you will get excellent results. Frying the papads is by far the most popular way to cook them but you can make lighter and equally as delicious poppadoms by grilling or dry frying them. See Note.
Ingredients
- 1 cup urad dhal flour
- 1/2 tsp salt
- 1 tsp Bicarbonate Soda
- 1/2 tsp asafoetida
- ¼ cup (approx.) water
Instructions
- Place the flour in a mixing bowl and stir in the salt and bicarbonate of soda. Slowly add the water, you may not need it all, to form into a soft dough. The dough should be slightly wet and a little difficult to work with.
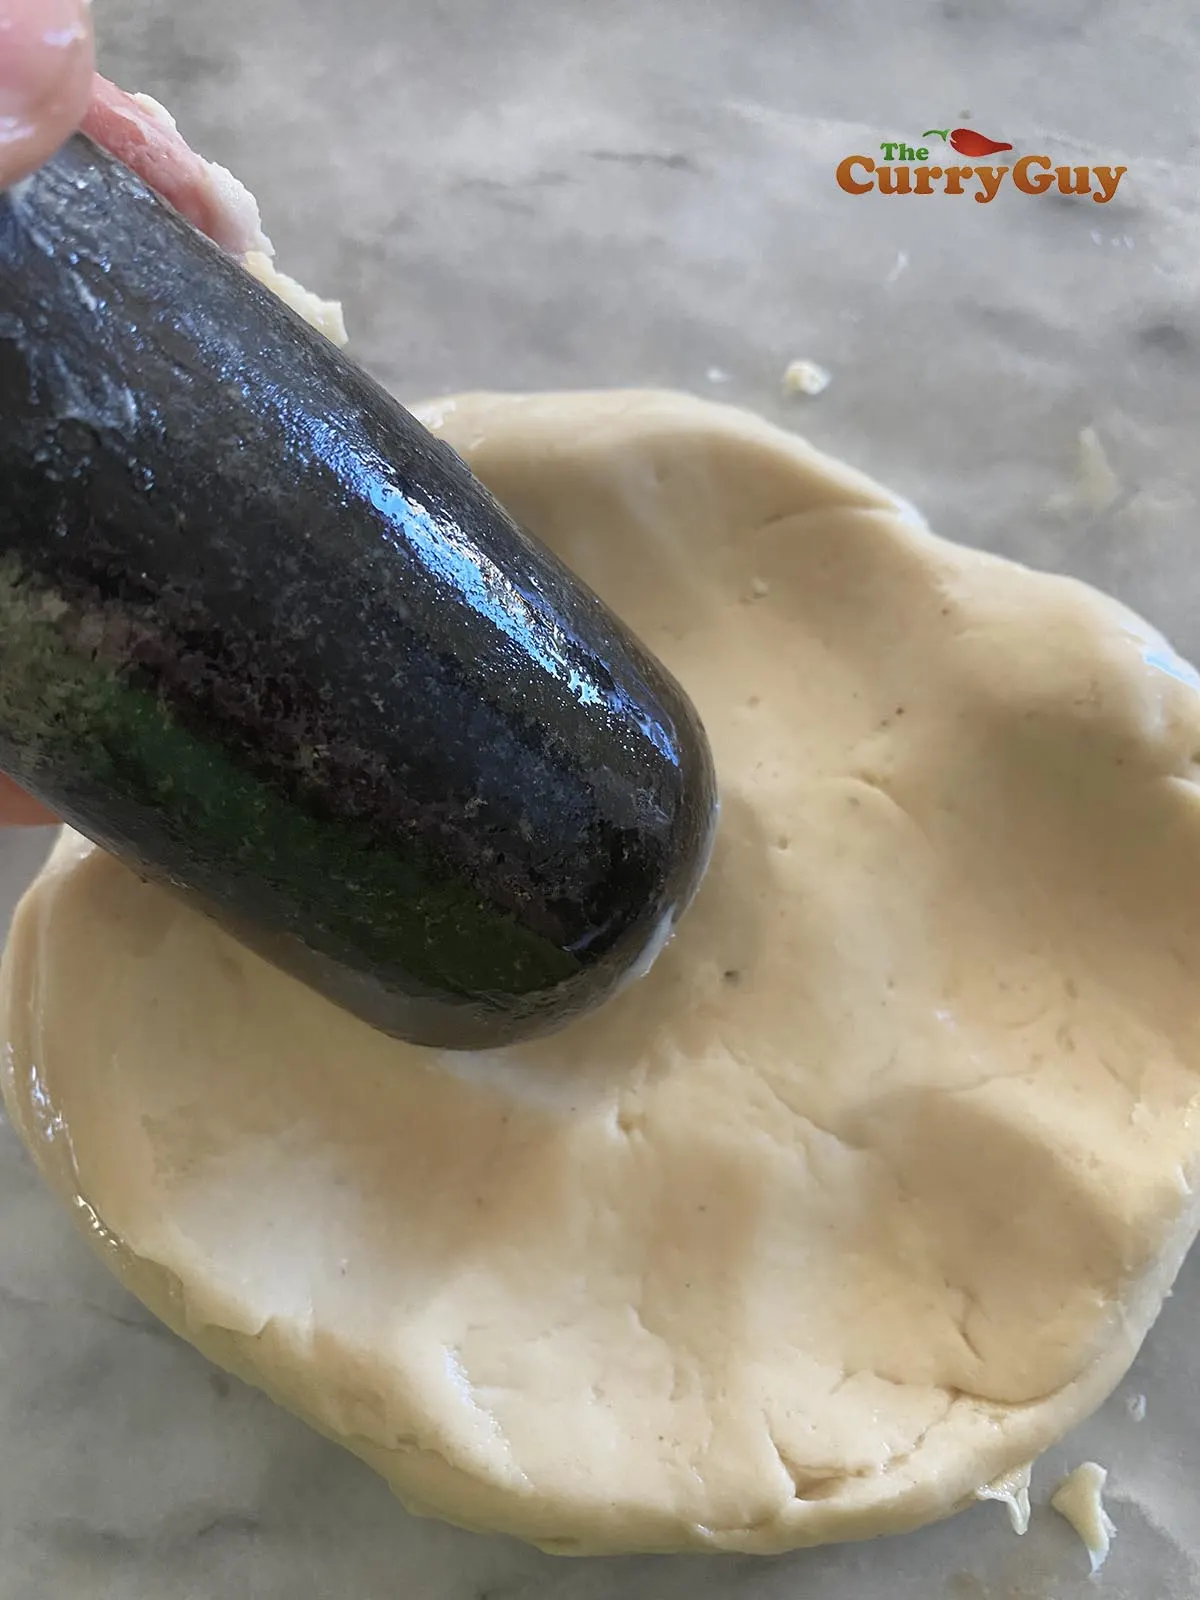
- Place this dough on a clean surface and pound it with a pestle or something similar for about 10 minutes, flipping the dough from time to time. This s the authentic way of making the dough, which gets better results than simply kneading as the flour is pounded harder together.
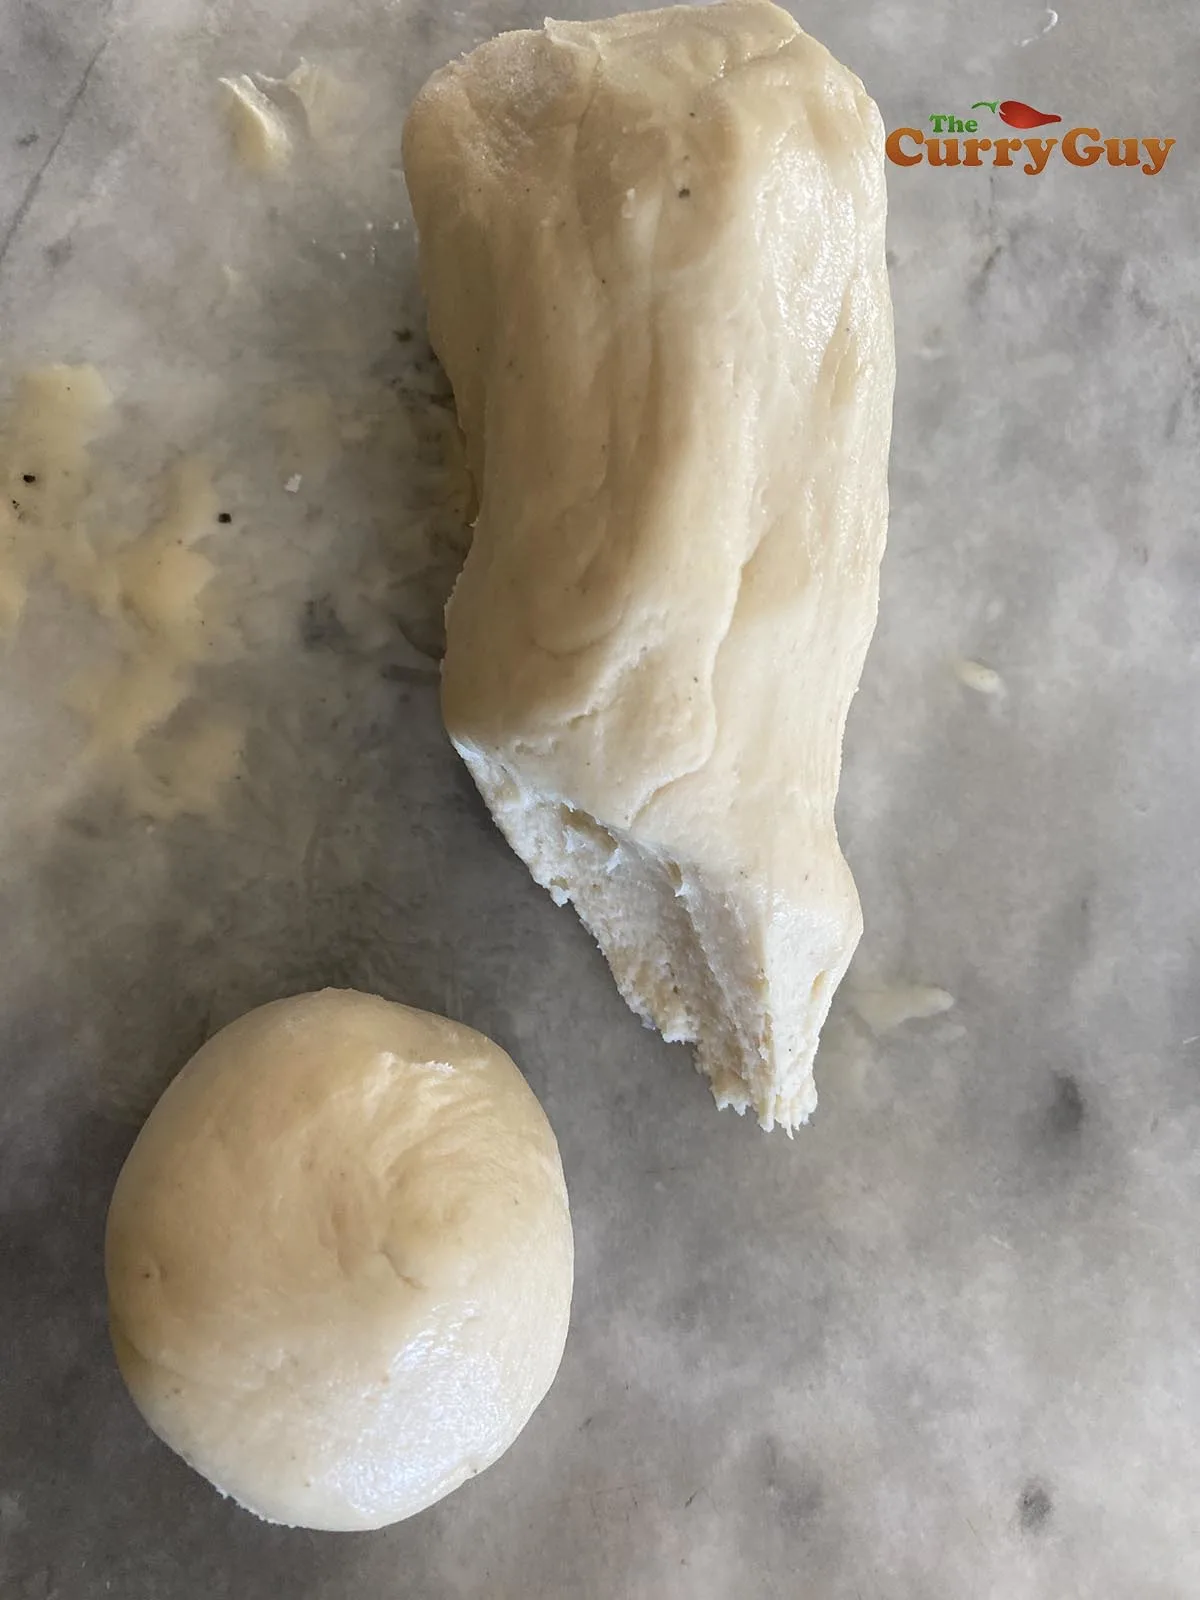
- After about ten minutes of pounding, you are ready to knead the dough. Squish and squeeze it in your hands for a couple of minutes. If the dough is still quite wet, add a little flour until you have a very soft and dry
dough ball. You shouldn’t need to add much. - If you have a tortilla press, your job of flattening the papads will be much easier. Otherwise, you will need to roll your dough balls out until paper thin on a lightly greased surface. You will need a knife to help remove the papad fro the surface. For a neater appearance, you could also use a round cookie cutter to but I rarely do.
- Dry the flattened papads in the sun, flipping from time to time on wax paper. In the winter, I place them next to a wood fire or electric heater to dry. I have also dried them in a dehydrator.
- When dried out, the papads will still be a bit flexible and not so dry that they snap in two when bent.
- To cook, heat about 10cm/4inches of vegetable oil in a wok or large pan. The oil is hot enough when you can throw a small piece of papad in and it sizzles and floats to the top immediately.
- Cook one or two at a time. They should cook through in a matter of seconds so watch them carefully so that you don't burn them. Transfer the cooked poppadoms to papertowels using tongs and continue cooking the remaining poppadoms.
- These cooked poppadoms will keep in an air-tight container for at least three days.
Notes
BBQ METHOD
If you would like to grill your papads you can do this over hot coals on your barbecue. Use tongs to turn the papad every few seconds until it is crispy and cooked through.
PAN METHOD
Lightly grease a pan or spray it with kitchen spray oil. Not too much! Then dry fry the papads over a medium-high heat flipping it with tongs every few seconds until cooked through and cripsy.
Recommended Products
As an Amazon Associate and member of other affiliate programs, I earn from qualifying purchases.


Nutrition Information:
Yield:
10Amount Per Serving: Calories: 50


Pjetur says
You write asafoetida in the ingredients but omit it in the instructions. What do you mean by this?
Sent from my iPhone 16 FTU using Tapatalk.
Dan Toombs says
Yes, sorry I will get that amended. Add it with the bicarbonate of soda.
Thanks
Dan
Dave R says
Your picture looks like you add caraway seed to the recipe, but I don't see it included in the recipe. If so how much do you add?
Dan Toombs says
I used cumin seeds in some of them, about a teaspoon but you could add the same quantity of caraway seeds instead.
Thanks
Dan
Carol says
Can you microwave these poppadoms rather than deep frying? Ready made are hard to find here in Italy so I was thinking of making these.
Dan Toombs says
No they would not work if cooked in the microwave I don’t think.
Thanks
Dan
Sylvain says
Do you think that once dried, they could be frozen and fried later?
Thanks.
Dan Toombs says
Yes I think that should work if you can manage to freeze them whole.
Thanks
Dan
Heather says
Hi Dan, thankyou for this recipe. I have some gram flour left over from another recipe, would this work as an alternative flour?
Dan Toombs says
That wouldn’t work unfortunately as the overriding flavour is the urid flour which tastes nothing like gram flour.
Thanks
Dan
Forest. says
Hello Dan.
Can I use as an alternative. Atta Flour?
Dan Toombs says
Unfortunately not, to make these you’d have to get hold of urad Dahl flour available in Asian markets or on line.
Thanks
Dan
Jacky Peacock says
Can these be sprayed with oil and then air fried ?
Dan Toombs says
I haven’t actually tried that but I think that might work so give it a go.
Thanks
Dan
MJ says
Could these be dried in the oven on a low setting, like 200F?
Dan Toombs says
I think an oven will be too warm as you are just drying them not cooking them.
Just dry them in the warmest place in your house, unfortunately this does take a bit of time and you can’t really rush it in an oven.
Thanks
Dan
abdussalaam says
would chickpea flour work instead not worried about flavor just the dough
Dan Toombs says
Hi
Unfortunately not, you’d have to use urad dhal flour.
Thanks
Dan
Alina says
Hi Dan,
I have just stumbled upon your website, and I love it! I look forward to exploring it.
Questions please:
What tortilla press are you using, and how do you like it?
Can I replace urad dhal and asafoetida with something else? They are a little bit hard to find. Additionally, I would rather use ingredients that I can use in other recipes too.
Thank you 🙂
Dan Toombs says
I just have a really old tortilla press I bought in California decades ago.
Asafoetida is quite citrusy so you could use extra lemon or lime to replicate the flavour.
There is no substitute for urid dhal flour but it is widely available in Asian shops and not expensive.
Thanks very much
Dan
Jenny says
Hi I have you pretty basic Indian spices amazon prime is wonderful don’t have the flour planing to order it the first ones I made were with chick pea flour because that’s available in an American grocery store and the recipe said chick pea flour rice flour or lentil flour but that had cumin seeds and black pepper I tried these served with chana malsa on a cruse I recreated the chana not the chip should I add cumin seeds or not
Dan Toombs says
Yes you could certainly add cumin seeds if you like them.
Thanks
Dan